Marketo
- 10 Jan 2023
- 1 Minute to read
- DarkLight
Marketo
- Updated on 10 Jan 2023
- 1 Minute to read
- DarkLight
Article Summary
Share feedback
Thanks for sharing your feedback!
Summary
Jornaya Activate has a direct integration with Marketo. This integration enables Activate signal data to be appended to existing Marketo records without the need for any technical development.
Things to Consider Before Using This Integration
Activate pass-through fields are not able to be sent to Marketo via this direct integration at this time.
Setup your Marketo integration
- Create Marketo fields to store Activate data
First things first! Before Activate data can be passed into Marketo it needs somewhere to land. Start by creating new fields on the Marketo record to capture and store Jornaya's data.
Reference the Activate 3.0 Specification for a complete list of the fields available and their data types.
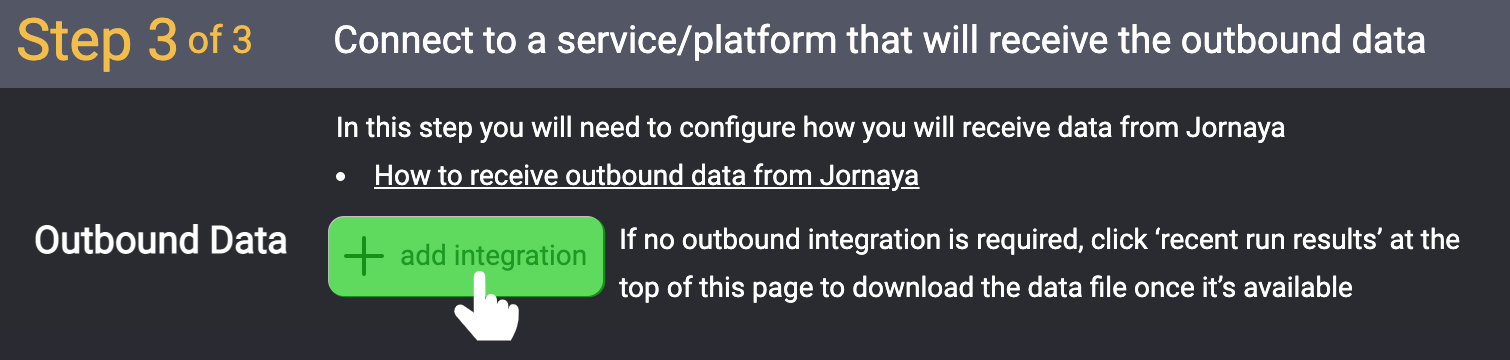
- Click "+Add Integration" to add an integration and select the "Marketo" icon from the pop up window

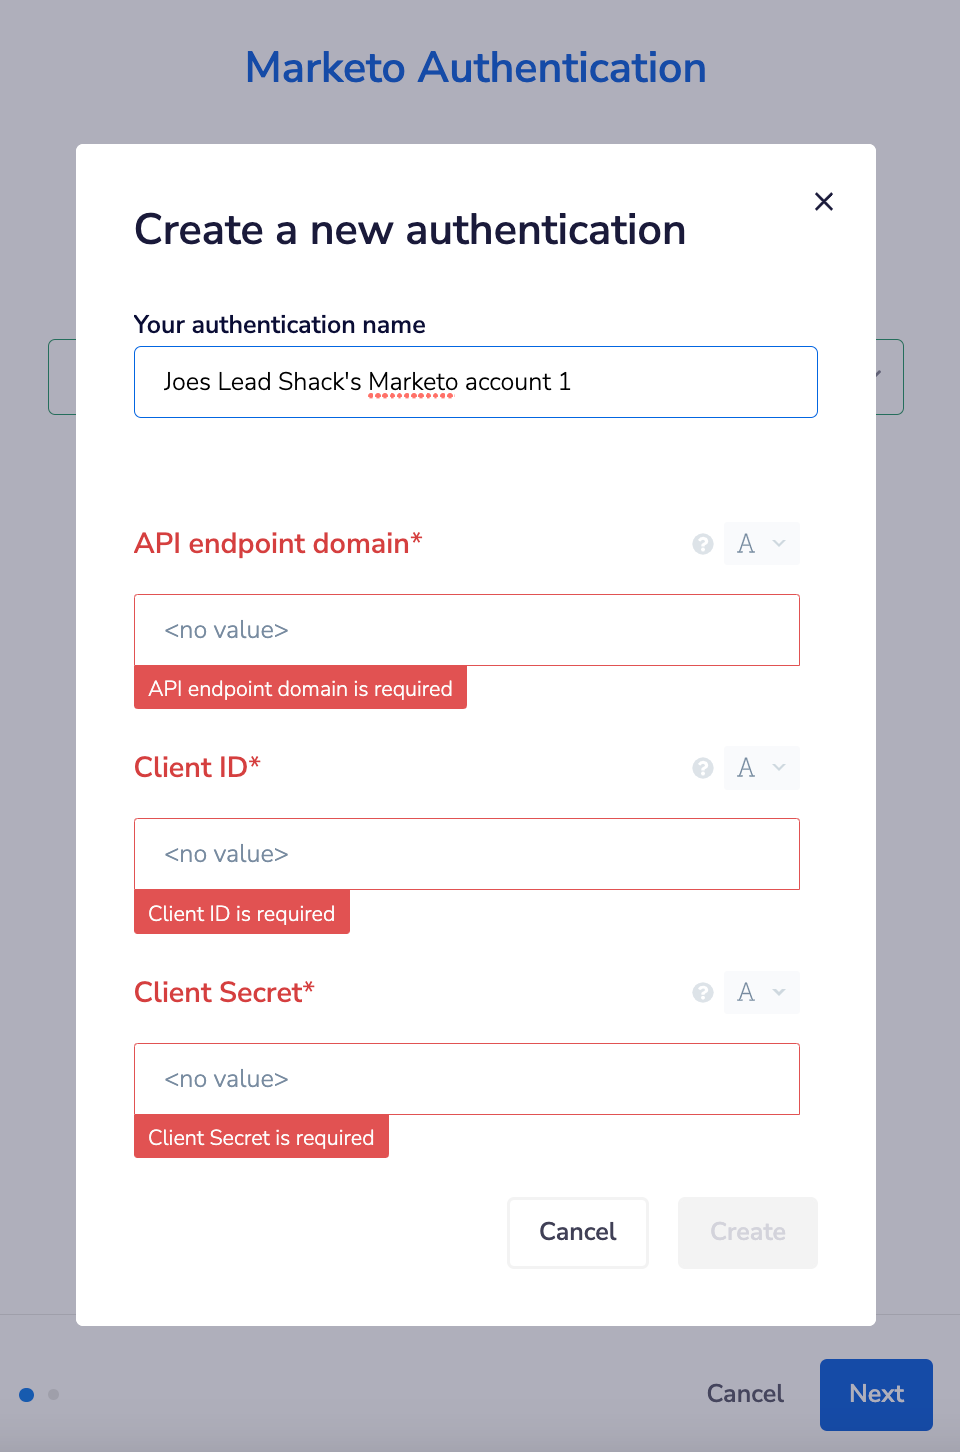
- Click "New Authentication" and authenticate with Marketo using the API keys from your Marketo account.

- Map the desired Jornaya Activate fields to the Marketo fields that were created in step 1 and click "Finish".
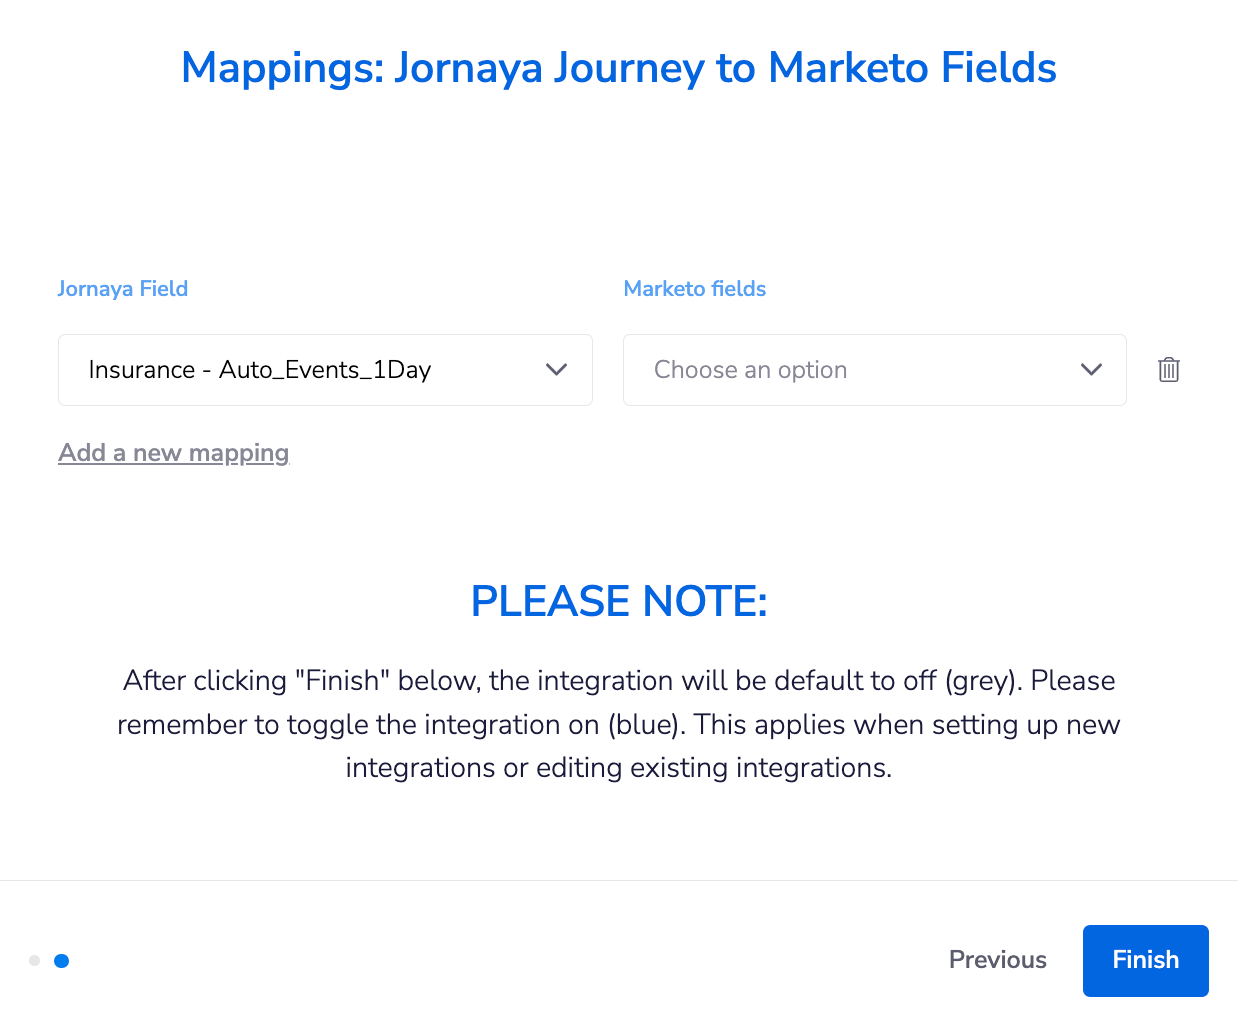
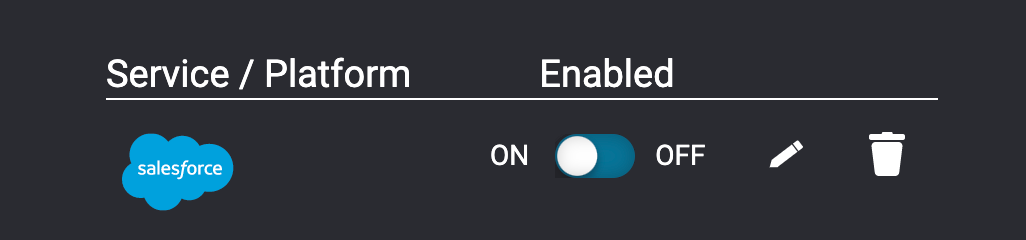
- Clicking "Finish" finalizes the setup of integration, but does NOT turn on the integration. Enable the integration by toggling it on (left/blue). Upon enabling the integration, the integration will begin in 5 minutes.

If there are any issues with the integration, the Jornaya Support team will be in touch with the next steps.
What's Next?
After the integration has been set up, it is time to test that data is being received as expected. Follow the steps in the Testing Activate Signal Integration article to finish setting up Activate.
Need to make edits to the integration? It's easy! Jump to Updates & Edits to Activate to learn how.
Was this article helpful?