- 13 Dec 2023
- 2 Minutes to read
- DarkLight
Ninja Forms
- Updated on 13 Dec 2023
- 2 Minutes to read
- DarkLight
Summary
This article describes how to implement Jornaya's javascript within Ninja Forms. Ninja Forms is a free form builder plugin for WordPress that enables users to build simple contact forms, event registrations, file uploads, payments, and lead forms.
The Ninja Forms WordPress plugin includes a form builder that is accessible via the WordPress platform and includes a database where the input values are stored and can be accessed directly from the WordPress platform. Ninja Forms lives directly on the WordPress page and is not a cross-domain embedded widget.
Need additional support?
If you have any questions or require additional assistance, please contact support@jornaya.com
Instructions
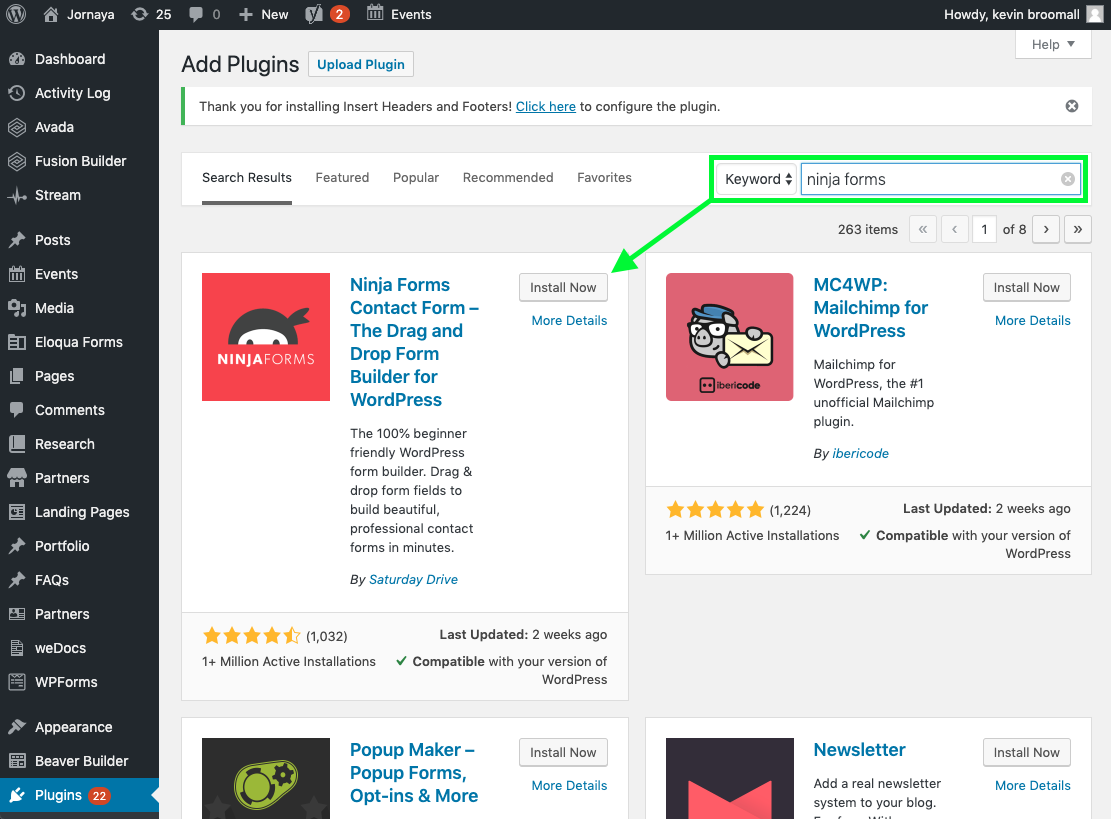
1. Add the NinjaForms plugin via WordPress/Plugins
a. Click on "Plugins" on the left side
b. Search for the keyword "Ninja Forms"
c. Click "Install Now" for the correct plugin

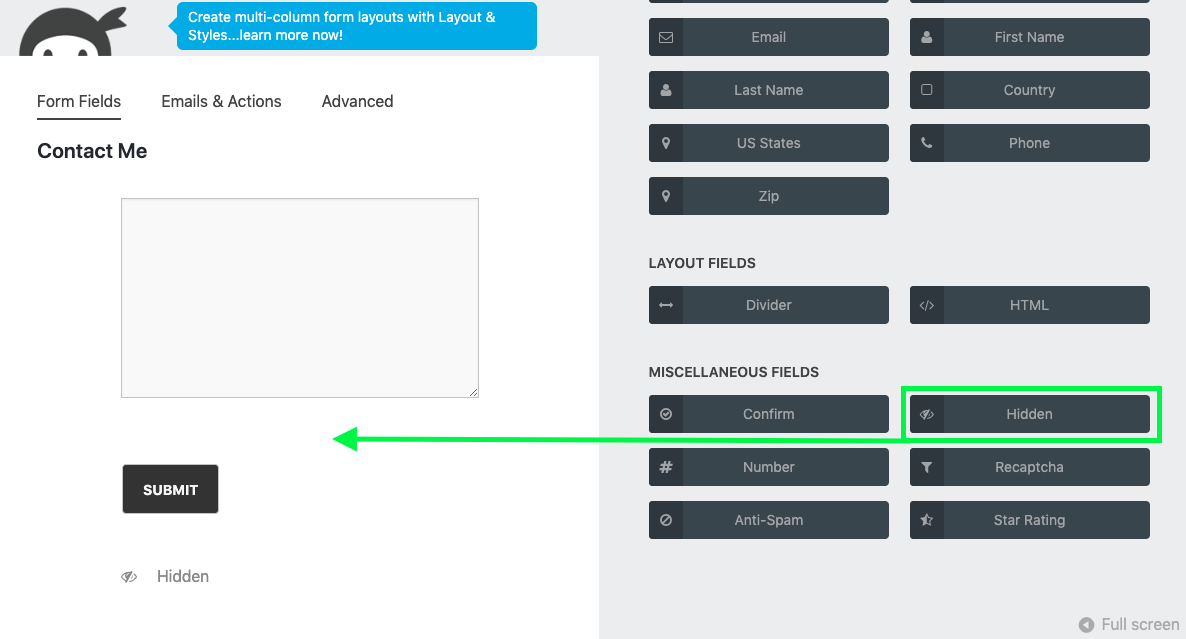
2. Add a hidden field to the 1st page through the NinjaForms plugin
1. Label the input as desired and leave the value blank

3. Identify the hidden field's "id" attribute by previewing the page and use the developer tools to find the new hidden input
1. For Chrome, right click on the page and click "inspect"
2. Open to the "Elements" tab at the top
3. Search for input type="hidden"
4. Copy the "id" of the field to a text document
4. Add the free "Insert Headers and Footers" plugin via WordPress/Plugins
1. Click on "Plugins" on the left side
2. Search for the keyword "Insert Headers"
3. Click "Install Now" for the correct plugin
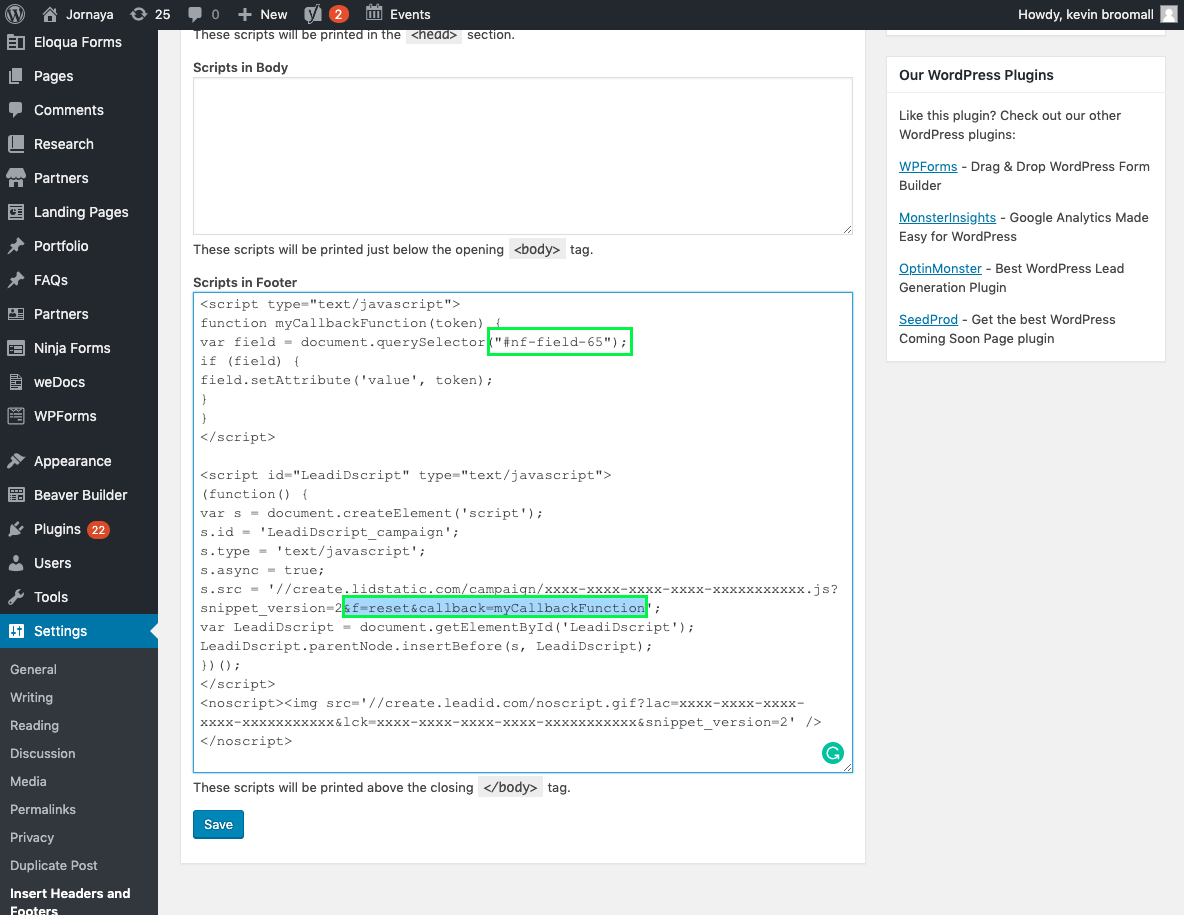
5. Add the callback function and Jornaya Campaign script via the Header and Footer plugin
1. A callback function implementation is required to define the Ninja Forms hidden input that the LeadiD token will be written
2. Change the "field" variable in the "myCallbackFunction" to include the "id" of the hidden form that was added
3. Add the Call Center tag (&f=reset tag) to ensure a token is written to the hidden input successfully on subsequent page refreshes
4. Ensure "&f=reset&callback=myCallbackFunction" is included in the s.src variable as shown below
5. Use the campaign src value from your Jornaya Member Portal account as the Jornaya Campaign Javascript below is not specific to your campaign/account
6. To get your Jornaya Campaign Code, please see the Getting Started Guide

NOTE
Below is an example tag format for Ninja Forms including the "&f=reset" and "&callback=myCallbackFunction" parameters in the s.src variable
Callback Function
<script type="text/javascript">
function myCallbackFunction(token) {
var field = document.querySelector("#HIDDEN_INPUT_ID_HERE");
if (field) {
field.setAttribute('value', token);
}
}
</script>
Jornaya Campaign javascript
<script id="LeadiDscript" type="text/javascript">
(function() {
var s = document.createElement('script');
s.id = 'LeadiDscript_campaign';
s.type = 'text/javascript';
s.async = true;
s.src = 'LOWERCASE_JORNAYA_CAMPAIGN_SNIPPET_HERE&f=reset&callback=myCallbackFunction';
var LeadiDscript = document.getElementById('LeadiDscript');
LeadiDscript.parentNode.insertBefore(s, LeadiDscript);
})();
</script>
6. Confirm the Jornaya script is working properly
Save all changes and open the website in a new tab to confirm everything is working properly
Follow the steps listed in this article to confirm the integration is working as expected: Create Implementation Testing.
Note
Additional custom development may be required on the publisher side to store the token in the Ninja Forms database.


