SFTP
- 10 Jan 2023
- 1 Minute to read
- Print
- DarkLight
SFTP
- Updated on 10 Jan 2023
- 1 Minute to read
- Print
- DarkLight
Article Summary
Share feedback
Thanks for sharing your feedback!
Summary
There are two SFTP delivery options for the Activate Signal Data and both are covered in this article:
The first option is to receive the Activate 3.0 Zip Package delivered to an SFTP, which can then be extracted.
The second option is to receive only the Activate 3.0 signal file .csv delivered to an SFTP
The company who will be receiving the Activate Signal Data will need to create and SFTP location prior to completing the integration steps below.
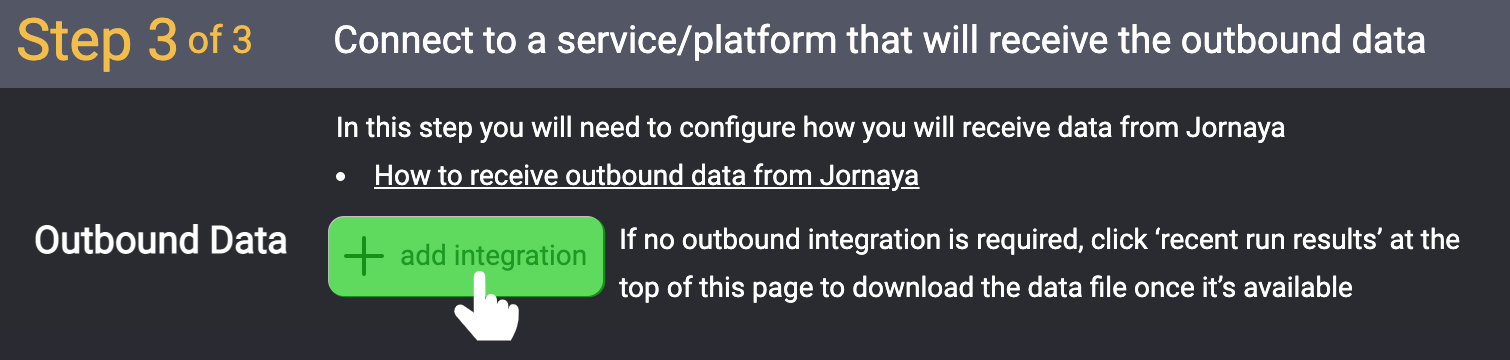
Setup Your SFTP Integration
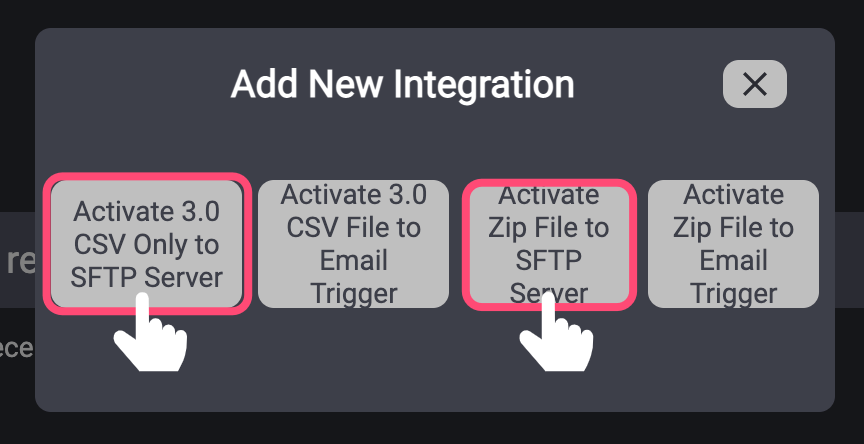
- Click "+Add Integration" to add an integration and select the "SFTP" icon from the pop up window.
Select either the .zip or .csv SFTP server integration options as shown below. Both SFTP delivery options are nested within the SFTP integration group.
Authenticate with the SFTP location information (e.g., host, username, password, etc.) that was created prior to beginning and click "Create"

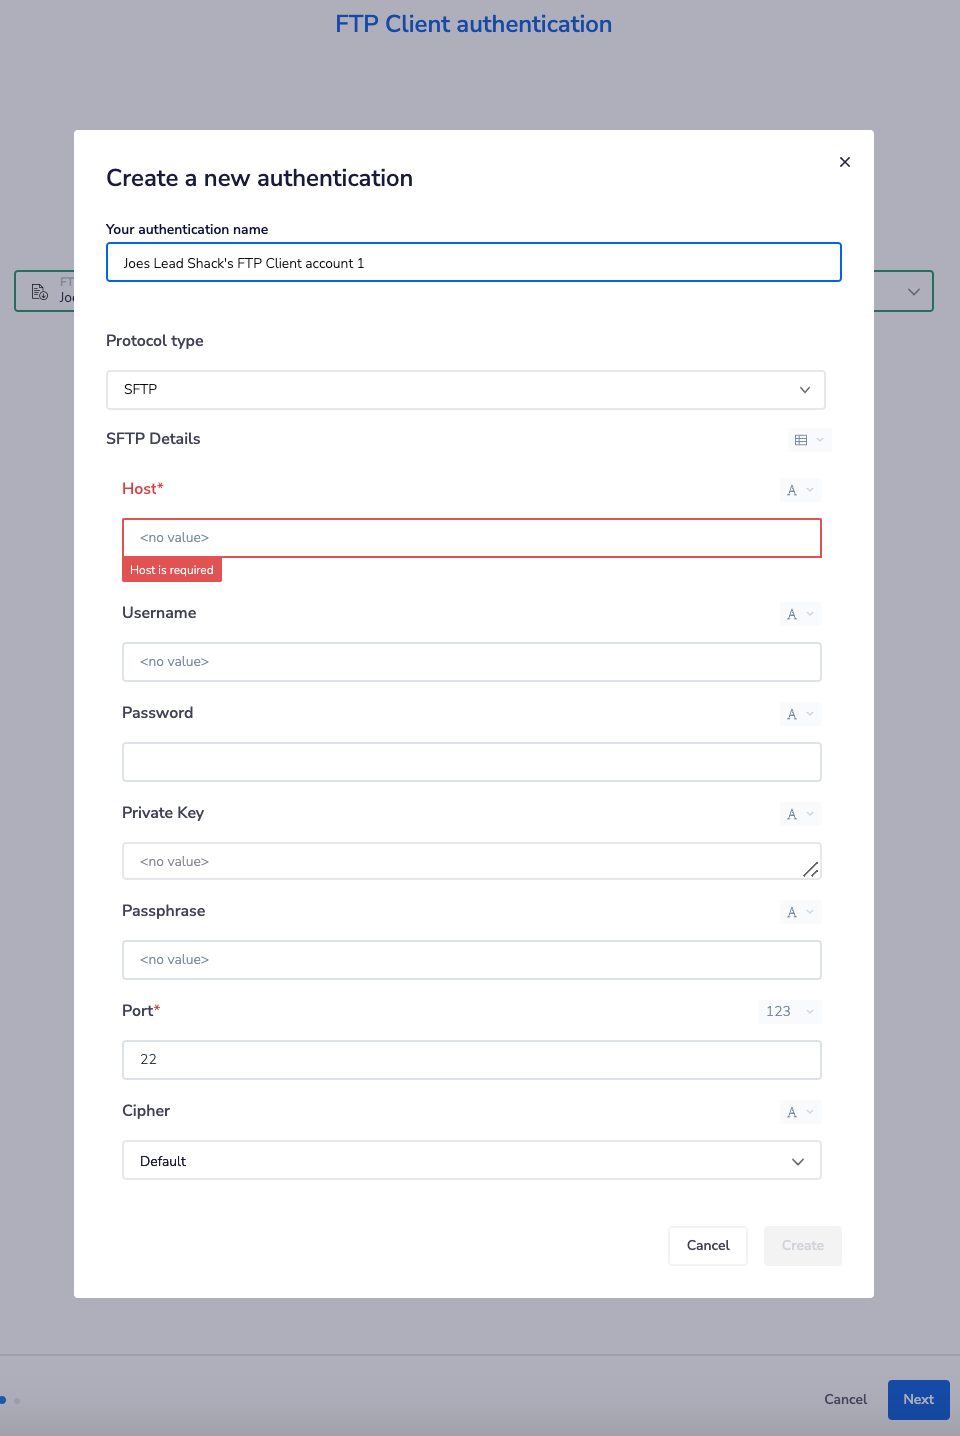
Using a public/private key to authenticate?
- Generate an SSH Key Pair
- Add the public key to your server
- Input the private key into myJornaya (using the Authentication interface)
- Complete the remaining authentication steps
- Note: Jornaya cannot provide a key pair as we do not have access to your account and credentials
- A file name prefix can be optionally added to the Activate zip package file name and the .csv file name. A file path may also be optionally entered for where the file should be placed.
If a file path is not entered the file will be placed in the root folder
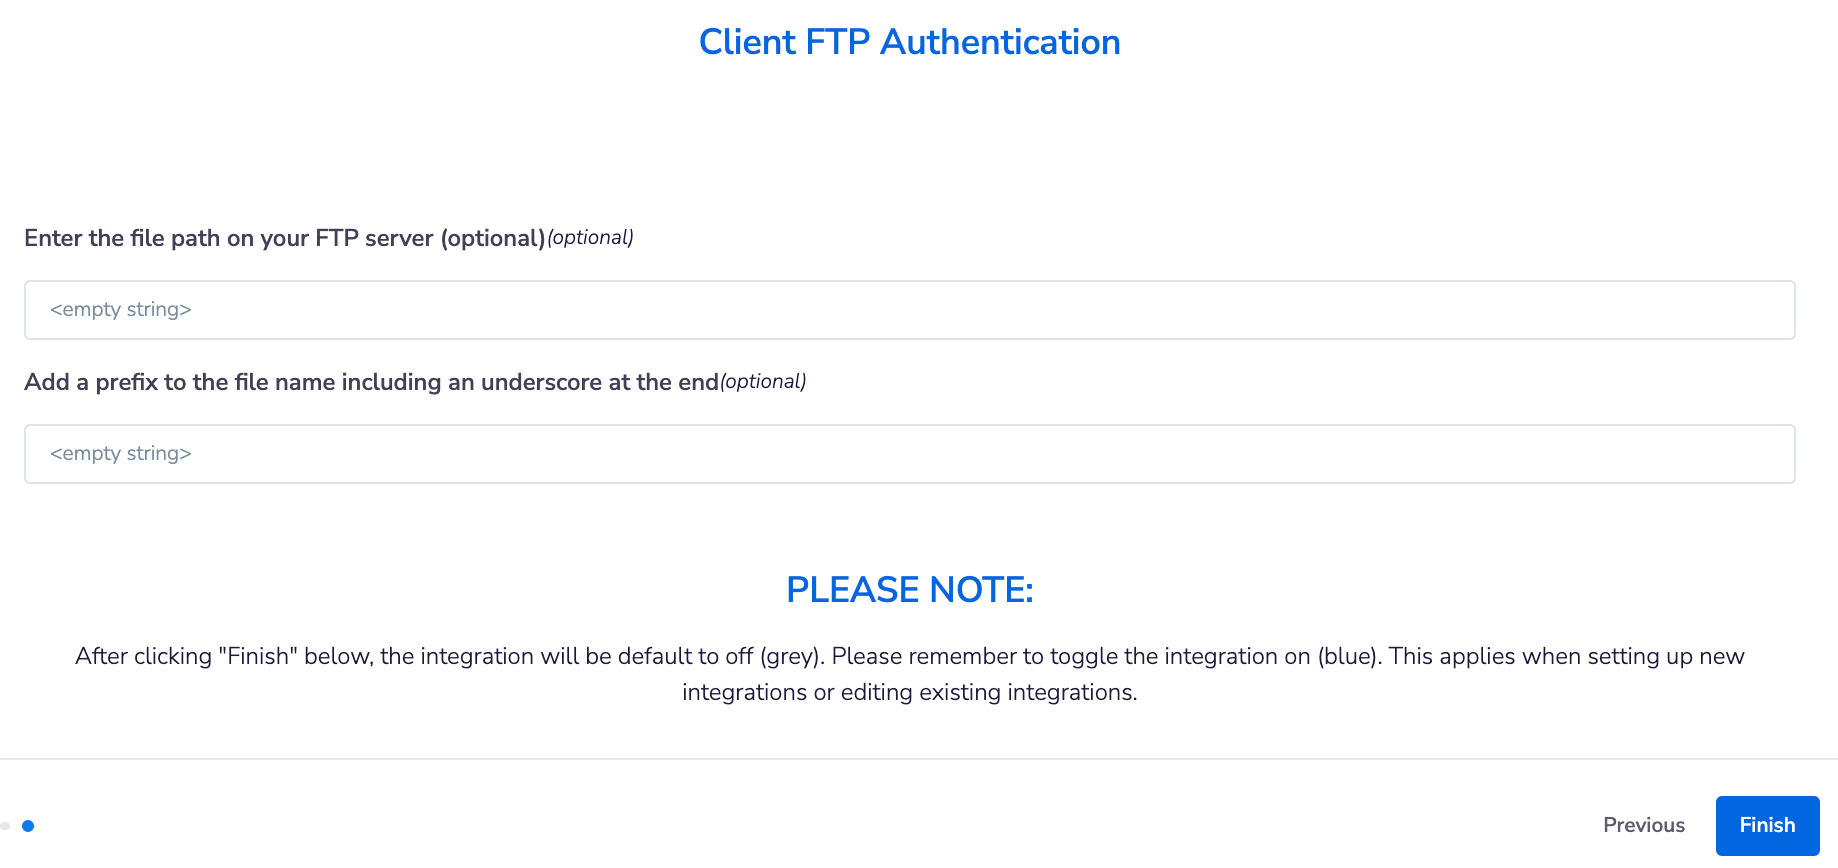
- Clicking "Finish" finalizes the setup of integration, but does NOT turn on the integration. Enable the integration by toggling it on (left/blue). Upon enabling the integration, the integration will begin in 5 minutes.

If there are any issues with the integration, the Jornaya Support team will be in touch with the next steps.
What's Next?
After the integration has been set up, it is time to test that data is being received as expected. Follow the steps in the Testing Activate Signal Integration to finish setting up Activate.
Need to make edits to the integration? It's easy! Jump to Updates & Edits to Activate to learn how.
Was this article helpful?